selfies

All posts tagged selfies

Mini update- Rising Dawn

Published October 14, 2017 by kittenmorag

Several years ago, a good friend of mine went through some changes in her life, and made a new alicorn ponysona based on it, called Rising Dawn

Rising Dawn ponysona

Isn’t she bonny?

So as a matter of stealth, I decided to make her a custom of her.

When pressed about her cutie mark, she said, ‘Oh, I don’t know, I guess maybe the rising sun? With anime wings? OH and a flower crown?’ I said a lot of not very nice things at that stage, but I went with it.

It was complicated, easily the most complicated thing about her. I decided to construct the flower crown out of nail decals, because that level of detail in painting is just beyond me. I managed to get it looking OK though!

Cutie mark close up

Here’s a WIP shot. That’s about four different decals in there

And it all continued going well until I used an acrylic varnish. TURNS OUT the leaf decals weren’t water fast, and so they ran D: So I did it again! Then I had to coat it with clear nail varnish (a cardinal sin), then do the whole lot again with my usual varnish

However, I think I managed to do OK with her, in the end

Please excuse terrible photos >.< I’ve learned a lot since I completed Dawn, and I think that shows a bit. The flower crown, however, is one of my favourite hacks- it’s actually an accessory from one of the wedding sets that I’ve painted. You can’t see it very well in the first shot, but there’s a small shock of orange in the tail, as well. The ribbon was added by the new owner, who loves her.

Shine on, Dawn, and rise to new heights. I’m thinking of you ❤


Have a Biscuit

Published January 20, 2017 by kittenmorag

So a little while ago, I was contacted by a friend, who asked if I could make him a custom for his boyfriend, based on one of his characters, Biscuit.

biscuit

Possibly one of the brightest things I have ever seen short of being literally neon.

Immediately I knew he was going to be a challenge, but in the fun, non-nightmarish way, so I accepted!

Some of you may recall that a long time ago, I started work on A G1 conversion of Big McIntosh, from the G4 show. Seeing as I hadn’t worked on that piece for a long time, and I was never going to be satisfied with how he looked, I decided to use that base. This was not very wise on my part, for reasons that will become apparent later in the song.

Basic colour palette was easy, but after the initial paint, I realised that I’d need to change the face, as matching the lines between the yellow pieces on the body and the head was going to be a nuisance

20160228_201406.jpg

Original paintjob- nice and simple, but with one design flaw

So I made a few changes. People laughed a bit, saying he looked somewhere between a Luchador wrestler and a super hero, but the customer was very happy with the changes.

20160305_145239.jpg

Only the blue side is visible here, but you get the picture.

To emphasise the wolf connection, I added a nose later in the process, and gave him the copper eyes that go on most of my totems/selfies.

As for mane, again, the colours were very simple to work out. I put some of Dollyhair’s Water Nixie on the blue side, and Bubblegum from the pink.

2016-04-25-19-36-53

Showing the colour variance, as well as his CUTE SMILING FACE

The body was reasonably simple, as well- clear dividing colour lines, roughly in half with yellow back panel and belly should be nothing too dramatic.

Until we got to the feet.

THE FEET.

Using a G1 Big Brother mold, he has molded hoof feathering, in the style of a Clydesdale. I decided it would be a solid choice to put some shadowing in the crevices, just to define the area.

That took FOREVER and was a detailing nightmare. Unfortunately, I didn’t have a suitable darker shade for the magenta, either, so I had to hand mix one every. time. I wanted to work on the details. UUUUUUUGH. You’re all invited to remind me of what a bad time I had next time I’m doing a Big Brother commission.

20161107_082021.jpg

However, the contrast makes a huge difference, as you can see from this WIP shot

Once I had the body ready, I was all set to re-attach the head! Or so I thought.

See, I’ve had this bait detached for the better part of four years. That time, as well as the somewhat extreme measures I had to take to strip the literally five layers of red from Big Mac pony, had warped the head to different dimensions from the body.

20161212_044605.jpg

Cue me screaming forever

FORTUNATELY, the customer was very understanding, and told me to keep working, and that he was sure it was fine. I love my customers! ❤

So once the head was on, all I had to do was style the hair and tidy up, and he was done! And boy, does he look good!

I thatched the hair for a good contrast (and i think thatching pretty much always looks good), plus the style covers his crooked neck seam. The yellow in his tail is recycled from a Fashion Styling pony, but is a match for Dollyhair’s Butterfly. The cutie mark isn’t quite a match for a wolf pawprint, but it’s close enough. I found the charm on Etsy at Stephanie Martin Beads, and added the same paints I used on the project.

I learned so much on this project, and while I suffered a lot of frustrations, I think he was well worth it. Apparently he was well received, as well, so that always makes my day.

Man, after uploading these photos, I need a Rainbow Paddlepop

tumblr_inline_n037fitxte1sxalso

An Australian staple and classic

The rise and rise of a Shackled Star

Published November 19, 2016 by kittenmorag

So when we last left our hero, she was in the middle of painting her first commission 😀 I’m pretty lazy though, so I’m going to be posting a lot of pictures without too much commentary, mostly because it’s pretty basic stuff.

20151107_231655

One of the first shots I have of her in progress, as you can tell by the paint >.>

So getting colours right was pretty simple, given I had a solid colour palette to start with. The cutie mark was another issue, though. Pro tip! Drawing straight, geometric patterns on curved pony butt is a pain! But as you can see, I managed to get it going in the end.

20151106_033304

Scuse kitchen, it’s where we have the best light >.>

The design for the head required a little more work, but with Shell wanting something visually similar to the Nightmare antagonists of the show and the comics, the visual was already well established, it was just working out the particulars.

nightmaremoon_l_ebay_gonewiththewind20

The Nightmare Moon brushable, which is the other main source for Shackled Star’s aesthetic.

With the colour scheme being black and purple with silver accenting, it only made sense that the hair colours should match. As you can also probably see in this shot, I also added a shimmer effect varnish, to help make her look more nebulous and starry

20151108_093041

Man, I wish I could smash out my own eyeliner game so fierce.

The wings were similar, with a purple ombre effect (YES OMBRE EFFECT)

20151107_011816

Still a work in progress, but you get the idea.

Once she got put together, Shell wanted a high, ringlet-y sort of hair style, and we all know what that means…

20151113_093101

BOIL PERMING!

And so, after a little faffing around once her hair had dried, some brushing, and a few finishing pieces…

I am so proud of her, and Shell was delighted. She took a lot of work, and I learned a lot of lessons, but I really couldn’t be happier with her.

OF COURSE if you would like your own commission like Shackled Star, or something entirely different, please contact me, and we can talk

My First Commission- Shackled Star

Published November 7, 2015 by kittenmorag

WELL after a year of stuffing around doing not much with my ponies, I was contacted by a friend of a friend regarding a personal display piece/sort of OC custom, so I’m PRETTY STOKED to be working on something like that!

Shell (the customer) wanted something in an Alicorn pose, with colours reminiscent of Nightmare Rarity, and that’s about it that she gave me to start with. SO ONWARD!

I love Nightmare Rarity, she’s one of my favourite things to come out of the comics 😀

Of course, as an Alicorn, I don’t have a lot of choice as to her body model. I wanted to get a Nightmare Moon Base, but it turns out that either it would be cheaper to buy one of the OC Alicorns, Princess Gold Lily or Princess Sterling, down the local shops, or I’d have to put up with a bad fakie. And by bad, I mean ‘unable to stand up due to two bowed legs’.

LUCKILY I had a Celestia in my Box of Baits, that a helpful little girl or boy decided to freshen up with some pink highlighter.

Because children scribbling on their toys with textas is almost inevitable

Because children scribbling on their toys with textas is almost inevitable

As you can see from this shot, not only are her hoof guards exceptionally coloured, which didn’t all end up coming off with acetone, but she has three rows of plugs on her head, and those go down past her ears. Hooray. The things we do to give Alicorns the FLOWING LUSCIOUS HAIR THEY DESERVE. SO off comes the hair!

IDK I think she looks good as a punk.

IDK I think she looks good as a punk.

The above shot shows how much the yellow paint stained the plastic. If I was painting her any colour other than black, that may have been a problem. LUCKILY NOT. I also left the eyes untouched, partially because I can just paint over them, using them as guides, and partially because even if I decided not to, the Alicorn model doesn’t have the moulded eye recesses the regular Playful Pony mould does.

As some of my regular followers may know, G4 ponies are painful, as they have these plugs in the neck that block access to the rest of the body and need to be very carefully removed. The good news is, with both these and the smaller Alicorn moulds, you don’t have to remove the neck plug! 😀 The bad news is you need to remove the wings instead, to get the tail out D:

Removal of Celestia’s wings took several hours. It took several hours because Hasbro still hasn’t gotten over its fling with glue. I mean just… just look at this

What the actual hell, Hasbro

What the actual hell, Hasbro

So several layers of plastic, a few close calls on wings, and two sincere attempts to take my fingers off, her wings were finally free, and painting could begin! Which I will address in the next post! Suffice it to say, I’m excited.

Quest complete! Gold! Weapons! XP! XP!

Published January 18, 2013 by kittenmorag

Except this isn’t a D&D Pony*, so I should cut it out with the obscure references.

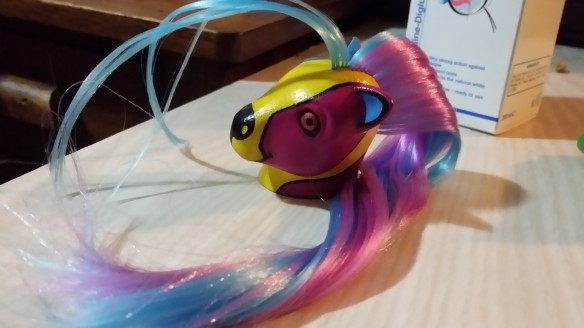
We last left Ashley at the point where we’d just finished paying attention to her body, and should get to work on her hair. This is how it looks so far-

Full spread

While it’s lovely to brush, she really doesn’t need all that hair. The main problem is what to do with it.

Official MLP ponies all have (at least) two rows of plugs, which means that if you want hair to sit along the sides of the head, like real people hair, you’re going to have to do some serious stuffing around if you don’t want a naked middle part.

Fortunately, there’s something you can do about it! Unfortunately, I was serious when I said it was a lot of stuffing around. It’s called thatching, and basically, it involves separating the hair plug by plug, and switching them across each other to make them sit opposite the way they do naturally. Apparently this is used a lot by custom doll makers, as well, so it’s pretty tried and true. But oh, my godmother, so much stuffing around. I’ve only had to do it on Ashley pony, but even that was a pain in my bum.

Thatching part way

I had to secure the hair somewhere so the thatching didn’t fall out, and over the ears worked, but your mileage may vary on that one. It didn’t take me very long, but I suspect that’s because I had less that I needed to work with than most of the other ponies. It came out looking like this-

Thatched hair

Sadly, I don’t have more photos of this. About five minutes after I finished, I realised that I didn’t have to do all that work after all, and that thatching would make what I wanted to do more difficult. I said a lot of swear words at that point, let me tell you.

So I basically needed to braid Ashley’s hair, set the hair style so that I don’t need to go fixing it once a week because it just falls out, and then trim the main part and her fringe down to an acceptable level. Setting the hair isn’t as easy as using hair spray (seriously, please don’t, the aerosol can damage your pony), but it’s still quite easy.

Styling eventually comes down to whatever you can wrap their hair around, and boil perming. I tend to use thin, round pens with closely clipping caps, and/or thick drinking straws, like the ones from Subway or McDonalds. Apparently you can use bobby pins, too, but who needs such fancy tools anyway? 😛

I ended up getting her plait to sit correctly by having my housemate hold the plugs down so that they fell to the back of the head, and braiding firmly from there. It worked, but apparently most modders loop one of the locks around the ear so that it sits properly, so again, your mileage may vary. I then taped her fringe down around her horn, and curled her tail around one of the pens, and then more tape.

Tape

Tape top

Then, once everything’s settled, you dip the pony in boiling water, so that the hair takes on the right shape. NB- if you’re using glue, take care that it won’t melt in the water. I found this out the hard way when Ashley’s head fell off after securing the neck plug before setting the hair >.<

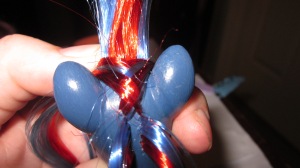
Speaking of, here’s the neck plug-

Plug

I decided to put her head onto the plug first, because otherwise water would get into the top of her head and not dry out properly, making everything gross. I made the mistake of gluing it in- the first time. After her head peeled off, I held her head in place while it was in the water, and then glued it in from there.

At this point, I should mention that most of the information I’ve gotten about styling pony hair came from CustomAnon’s Bad Mane Day guide on DeviantArt. They’ve got a solid line on how to make the Mane 6** toys look closer to their television counterparts.

Anyway, back to the story! Once the glue had dried, Ashley was finished-

Ashley side

Ashley back  Ashley flank

I cannot properly express how deeply thrilled I am by how she turned out. There are little problems, yes- the varnish didn’t go on evenly, and is a bit lumpy, the neck seam isn’t meeting properly, etc etc- but she’s still beautiful.

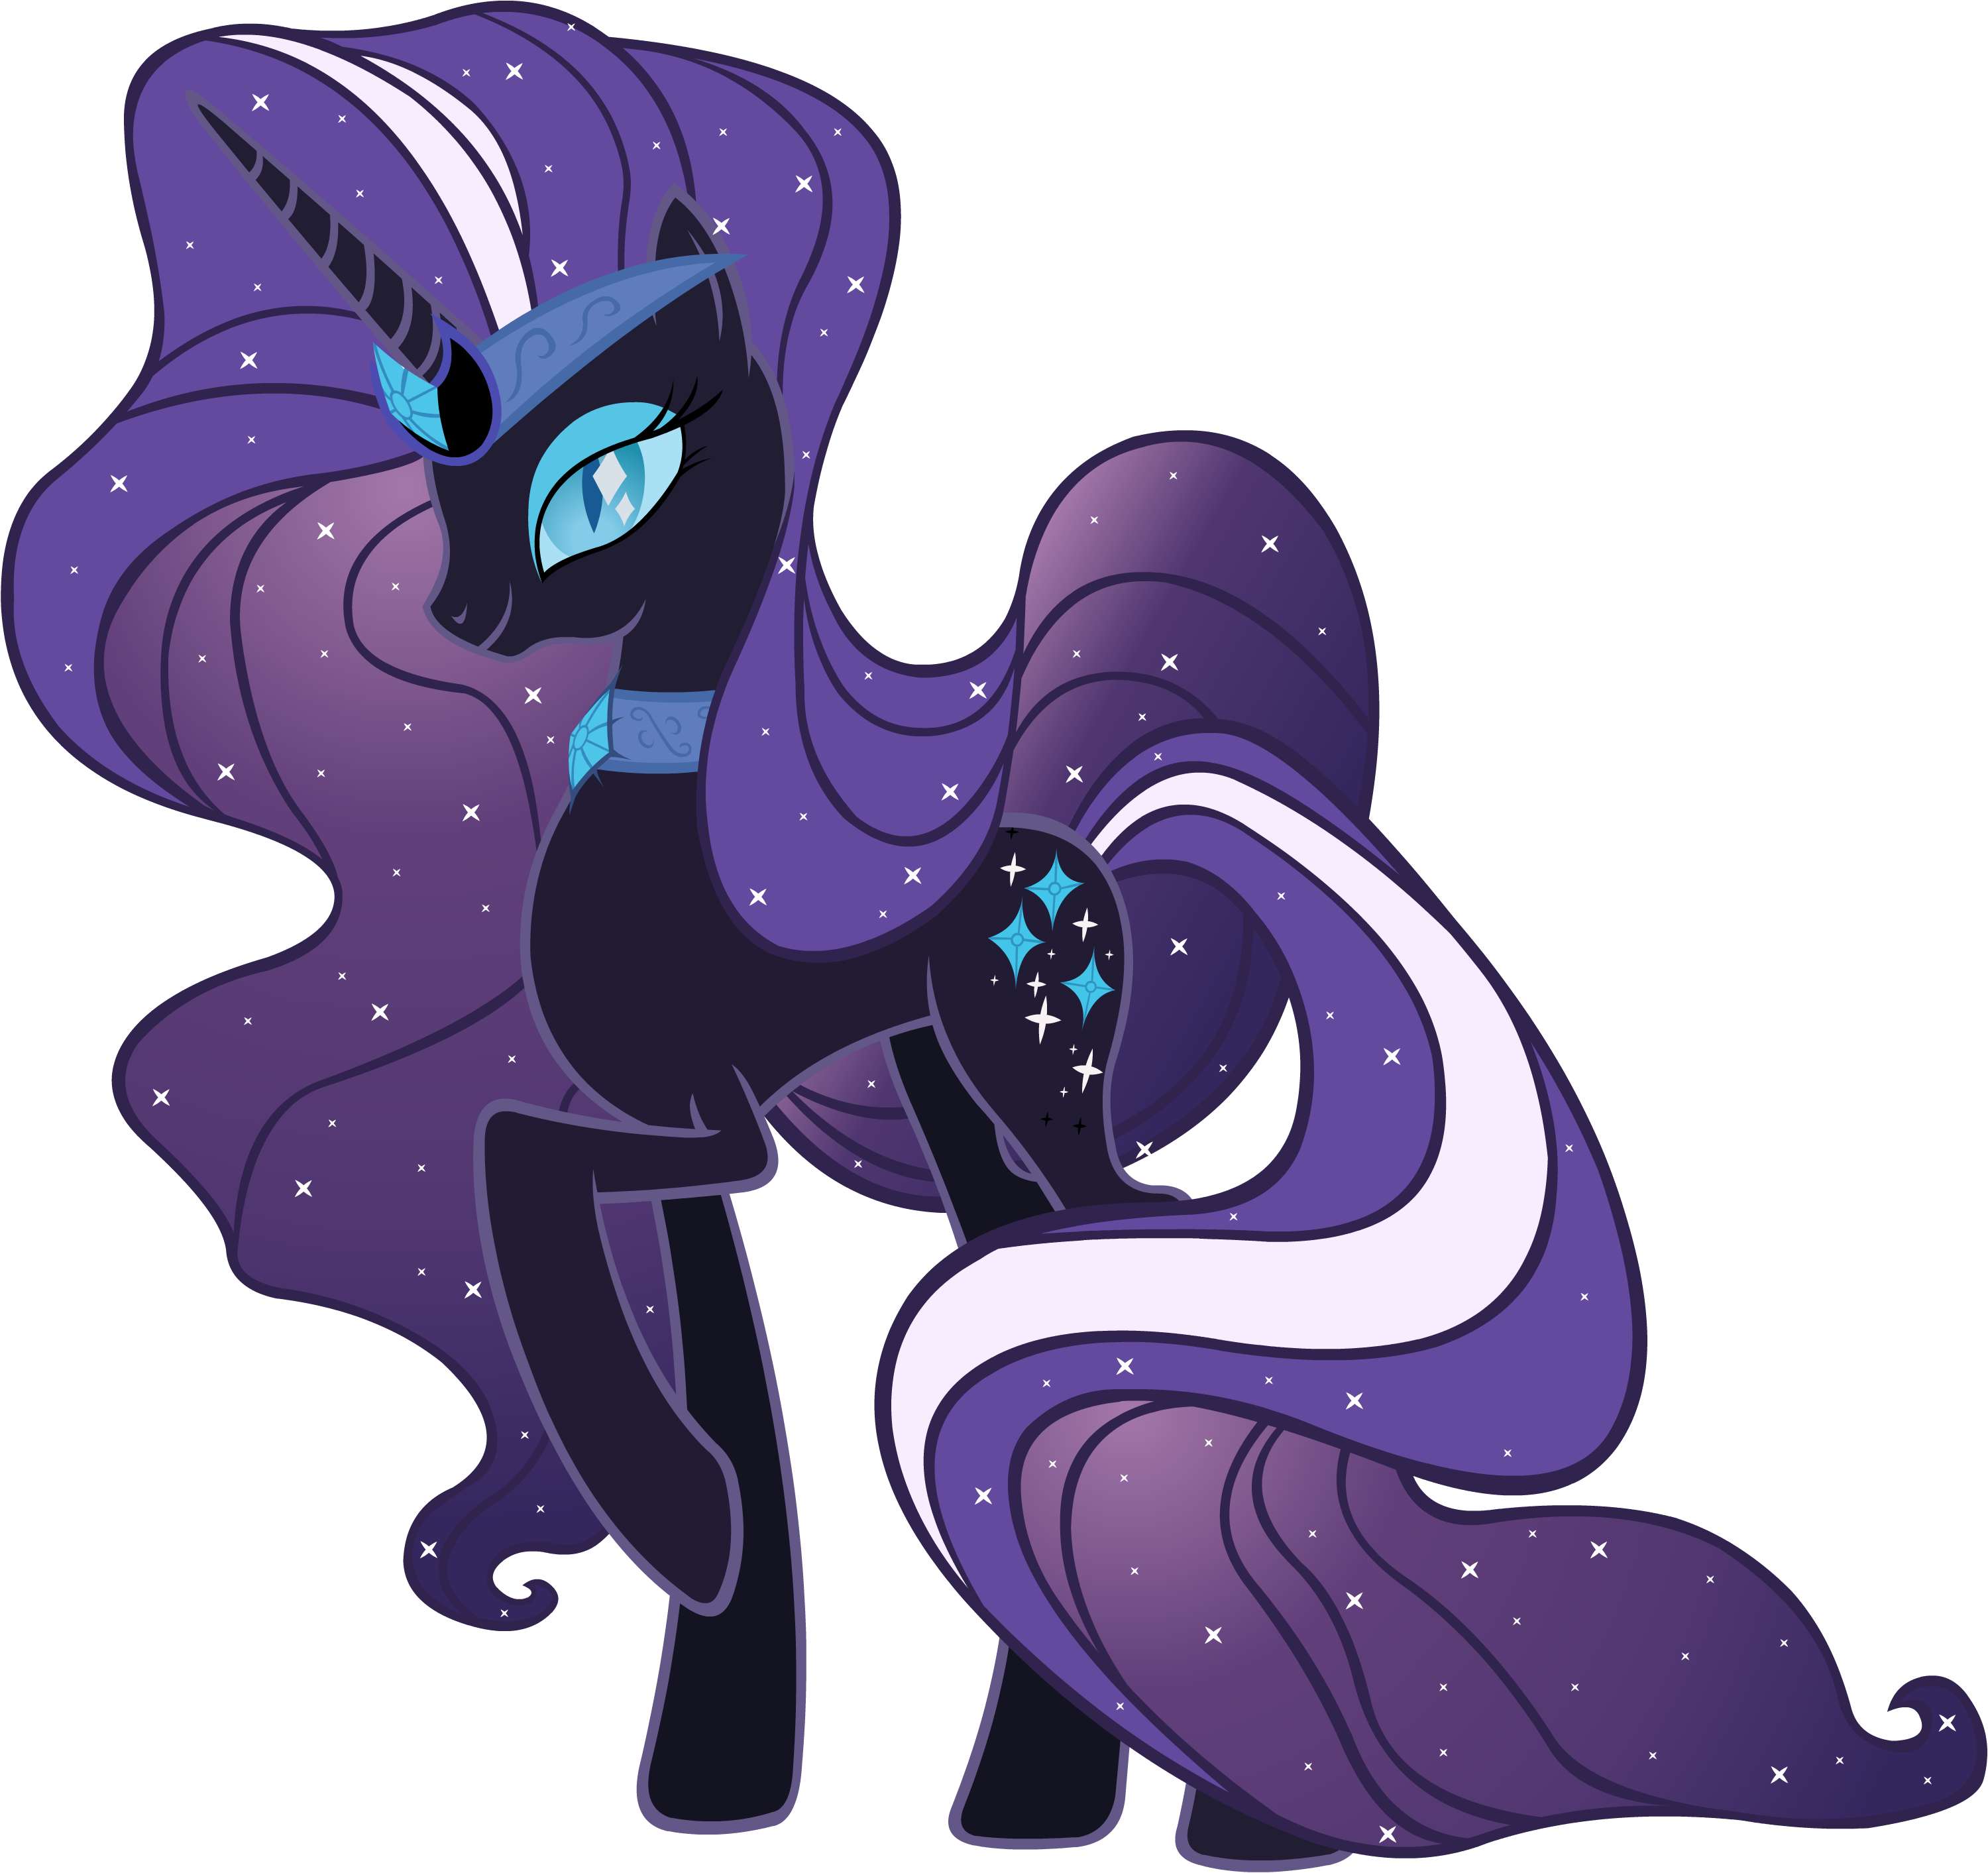
Here is how the design started out-

Ashley cropped

There’s a bit of deviation in the colour, but I think it’s all turned out for the best! The only bit missing is the glasses, but I’m happy to wait for those. There are, however, glasses available via playsets. They are pink, and in the shape of love hearts, so, no, I don’t think so.

River Dreamer lives in the shadow of Nightmare Moon

River Dreamer lives in the shadow of Nightmare Moon

And there you have it, ladies and gentlemen. The single most nerdy thing I have done in my life… probably >.> After my initial gripes about modding G4 ponies, they were actually surprisingly easy to work with. I may do another sometime, I’ve been thinking of making some of the Blind Bag ponies, but we’ll see how my five million other projects go.

* Yet. I should learn to stop talking before I give myself more ideas than I have time for >.<

** Yes, that is actually what they’re called. It’s not my joke, don’t blame me 😛

Cutie Marks are frequently the bane of my existence, and other body detail

Published January 1, 2013 by kittenmorag

So, here’s a bit of pony trivia for you. The marks that ponies have on their flanks didn’t have a name until G3, where they were called ‘cutie marks’. It’s a bit weird to think that one of the most identifiable parts of the franchise didn’t have a name for fifteen years or so, but hey, whatever.

What I now know is that cutie marks can be massive pain in my bum. For something so small, some of them need absurd amounts of detail >.> OK OK, I tell a lie- for something so small, sometimes I come up with an absurd amount of detail for them.

I’ve had a clear mental image of how I wanted Ashley’s cutie mark to come out. The character works with dreams, and the name of her ‘ponysona’ is River Dreamer, so the simple lines of the moon rising over a river would work. Unfortunately, it’s a little difficult to get them to work on a dark blue background. I finally used a Staedtler Triplus fine liner to trace out the design, as well as the hoof detail. It went on OK, but as the pens aren’t water fast, I needed to come up with a way to paint the lines on so that they didn’t suck.

Fineliner detail

You can see the paint beginning to make the lines bleed in this picture, it’s not the greatest in the world >.<

I have a strong essential tremor- it’s very apparent on both sides of my family, and something in my meds only makes it worse, so I was really, really hoping that I’d be able to get something to make my life easier. I have a couple of art and craft stores local to me, so I went through them one by one, and while most of them were highly sympathetic, they all had the same answers for me- no, we don’t think that there’s an acrylic paint pen, we’re really sorry, the best we can offer you is a super fine brush. The brush is super awesome (Artist First Choice 2/0 taklon brush from Riot Art and Crafts tell your friends), but it’s still going to go everywhere under pressure >.<

Then, oh blessed day, I discovered Posca paint pens, as mentioned in my previous post. They made my life so much easier. The nib is a little thicker than ideal, but it goes on like a dream. With my new tool in hand, finish off the lines became much easier, which then meant that getting the colouring done was much, much easier, as well.

This is how it turned out-

Body lines finished

I was originally going to paint the banks of the river a green colour, but it just didn’t look right, in tone, or in the visual concept that I wanted. Crisis averted!

I’ve had a bit of a love-hate relationship with the hooves. I really love the ‘Big Brother’ hooves aesthetic, and included them without thinking how much of a pain in the bum it was going to be to paint a white layer with scalloped edge on a tiny portion of a tiny pony >.<

Hoof detail

You can see that they’re quite uneven here, and victims of my dreadful tendency to over-paint. It looks particularly lumpy right up close, but at least I sanded it down a little before the varnish went on >.< Still, learning process, and overall, it’s looking quite acceptable! Next, reassembly and hair! 😀

Ashley Pony – It actually got easier when I stopped listening to tutorials*

Published December 19, 2012 by kittenmorag

Hallo, everyone!

So, it turns out I have a draft about Red Hat pony sitting here, waiting for me to stop being lazy and upload those pictures. BUT NOT TODAY, MY FRIEND, NOT TODAY! I’ve been really inspired to continue with Ashley Pony, and I’ve gotten a pretty significant amount of work done, which is pretty smashing.

So, here is where I got up to before I threw my hands up in despair last time-

Start point front

The hair standing up in there is her fringe. Yes, it looks odd, but I need it that long to get the fringe right in the first place.

Start point side

It looks just as ridiculous from the side, but you can see her eyes here. Now that I’ve got a close up, I can see all the dodgy, wobbly bits, but they still look pretty sweet IRL

Start point neck plugs

This is as far as I got into the mane before I flipped a table and moved onto other projects. There’s only two plugs of hair in there, so I have a long way to go.

Start point neck plugs naked

To clear the plugs out, we use (a push pin), which also helps widen it to take the new plug. The structural damage this causes didn’t occur to me until three of the plugs in the mane (down on the bottom right) popped while I was working on them >.<

Popped plugs

This became even more of a pain in the bum when I was re-rooting the mane, for reasons that I’ll explain shortly.

There are some truly stellar tutorials for converting all manner of ponies. I’ve linked to two my favourites for G4 ponies in the side bar, and all the props in the world go out to CustomAnon and OkieGurl1981. However, I was finding the instructions for re-rooting really, really hard to pull off. One suggests use of a needle and thread, which became flipping difficult when the holes were perpendicular to the neck opening, and the other starts ‘So, use your re-rooting tool…’ NB: I will probably buy a re-rooting tool, if only to stop the bruising that came about after finishing Ashley’s mane >.<

Eventually I decided to go back and try my previous method, involving beading wire… and it worked, quite well. I spent a while staring at the internet, not understanding how any of the other G4 modding blogs had failed to mention the method that I’d been using since day one as even an option, let alone a viable one. Once I was done being dazed and displeased that I hadn’t thought to double check, I continued re-rooting

Sadly, although the wire made that part of the task easier, there was nothing it could do about the fact that I was reaching into her head blind with a grasping tool, and I had no way to know what I was holding onto until one of the plugs fell out the bottom. Of course, with three plugs popped on that right hand side, pulling one out usually took all three with it D: I was certainly beginning to have a tiny moment of understand as to why Hasbro poured half a bottle of glue into the heads of their G3 ponies- I still loathe the practice, of course, but I could understand it a bit by the time I was through >.<

In the end, I got through, and here’s how she looks now-

Full spread

Finished plugs close up

I’m freaking stoked with how the hair turned out. I thought the blue was going to blend too much into her base colour, which ended up more blue than grey, but it looks pretty sweet. All I have left to do with it is style it, but I shouldn’t do that until the head’s back on the body.

Speaking of the body, stay tuned, I’ve been doing a lot of work there, too!

*NB: Please don’t stop listening to tutorials unless you have a solid idea of what you’re doing. I know I’ve lost a lot of projects going ‘STUFF THIS, I’mma do it my way… OH GOD the lines are moving by themselves D:’

A moment of kvetching

Published June 9, 2012 by kittenmorag

So, instead of a glorious second post about how awesome ponies are and how easy and fun it is to customise them, I’m going to take a wee moment to bitch about customising G4 ponies.

This is a picture of the ponysona of one of my roleplaying characters, Ashley

One of the nerdiest exercises I’ve ever engaged in.

I decided to try and make an actual custom to match the image. Obviously, I have too much spare time. Here’s the pony I used as the base-

I feel a little bad for modding a pony from a show I’m literally watching right now >.<

The very first release of Twillight Sparkle had plugs for a fringe, and was the only unicorn to have them (Early Applejack and Rainbow Dash did, as well), so she was pretty essential to my plans. And, of course, plaiting her hair was going to be super easy, and I can just paint her hooves on, and pfft, doll’s glasses exist on the internet, this is going to be a piece of piss.

And, of course, I was wrong.

One of the first and most persistent troubles that I’ve run into is the shape of the head. In order to reroot the hair, you have to run implements and locks of hair all the way through the head to get them to sit properly. G4 ponies are much, much smaller than the ponies I usually mod, though

Ponies from left to right- Majesty, Brights Brightly, and Twilight Sparkle. Also featured, Glory, one of our cats

Majesty there is a G1 pony, which are my favourites to mod, because they’re big and easy to work with. Brightly is one of the few G3 unicorns. I go to G3 for customs where dynamic poses and expressions are valued over ease to work with. Twilight Sparkle is who I’m working with right now.

Here’s the area I have to work with-

Again, Glory helps out by sitting right in the middle of my shot. Thanks, Glory

The head onthe left is G3 Bumblesweet, who I’m also working on. In the middle is Ashley pony’s head. On the right, as you can see, is a 10c piece, which is about the size of a quarter.

Nonetheless, I’m going to do more of her now, because I obviously hate myself. I hope that the next time, I’ll look at this post, and the ones that will probably come after it, and remember that I said I’d never do a G4 mod ever again.

That seems to be pretty unlikely, though >.<